Oct 19, 2016 | Cosplay, Events, International Cosplay Contests, Japan, Travel |
I could luckily finish all my costumes a month before departing. So everything I did was just planning and packing until we could finally depart.
With our 3 big suitcases, 1 roll, 2 hand carries we went to the airport, checked our stuff in and got rebooked into a flight going 1 hour earlier than expected. …
I am very happy that I am used to flying and know the airport. So we could rush there without problems.
Chiko also had troubles checking in into her flight from Tokyo to Nagoya.
This is also why we couldn’t sit next to each other at both short flights.
|
| Our baggage |
In Frankfurt we got a snack, played Pokemon Go and tried to get a boarding ticket for Chiko. We still don’t know what happened but it seemed that it was quite difficult to check Chiko in… (She also had problems at the flight back to Germany).
Finally we could board the airplane to Tokyo.
Normally the German Team flies with their organizer. But due to some booking issues our organizer booked a flight for an earlier date.
After some movies, ice cream and a lot of really bad sleep I had to fight for my immigration card as always(The stewardess always thinks I am Japanese… I am a German potato…).
If you have a domestic connecting flight in Japan you first need to immigrate, get your baggage, go through customs and check in again.
We were 30 minutes to late and had 1 hour until departure.
Again we were rushing. Because our roll was special size baggage, we waited a long time to pick up our stuff…
I was very happy that I could explain the customs quickly, why we have this odd size baggage….
After checking in our stuff again we boarded the bus to the domestic terminal.
And voila Team Canada where standing directly in front of us. That was a very funny coincidence.
After going to the gate and boarding we said bye till Nagoya.
 |
| With our Canadian candies *o* |
 |
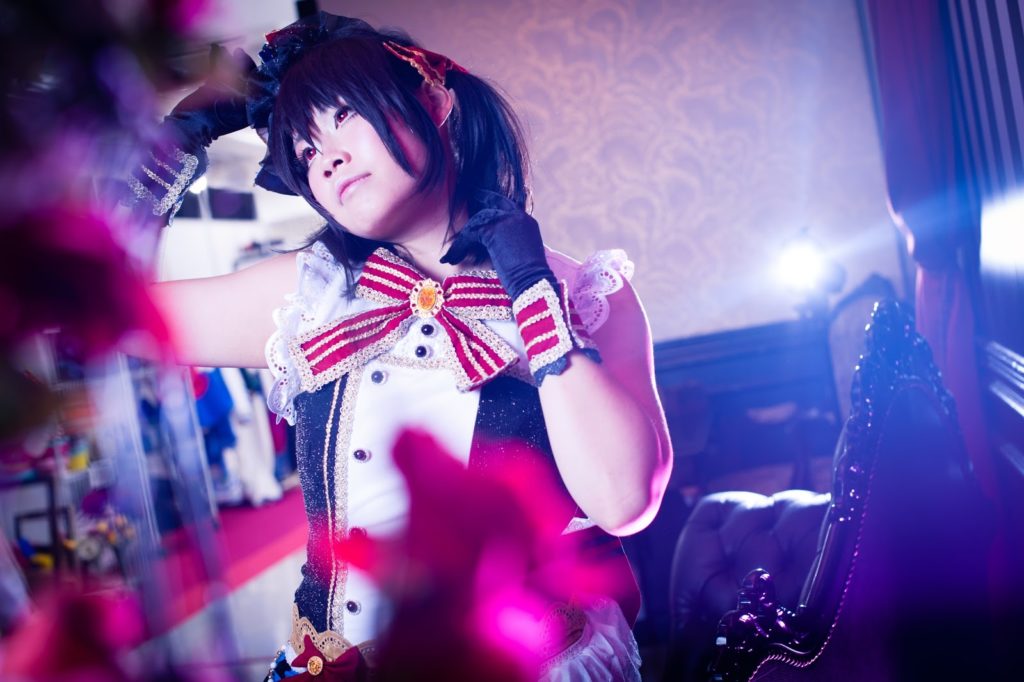
| After some make up XD |
But they where sitting directly next or behind us. Out of 200 passengers Team Canada and Germany had seats next to each other. 🙂 It was a fun flight with both of them.
We knew that a camera team will be waiting at the airport that’s why we changed our cloths and put on some make up, so we won’t look like zombies after a 16 hour trip. This is why we were the last one picking und our baggage and the stewardess where running around with our stuff, panicking and searching for us. ToT I am still sorry for her…
 |
| With our organizer Patrick |
At the arrival our organizer team Patrick, Iris, Laura and Mo were already waiting for us. The team took some pictures, filmed us and made a small interview.
Afterwards our Omotenashi student Eriko chan greeted us and showed us the meeting room (I would more call it a baggage storage room XD). We left our stuff there and went to dinner with Team Canada and Brazil at the airport.
 |
| Interview at the airport in Nagoya |
Afterwards we boarded the bus and checked in into our Hotel, where we got a loooooot of stuff. Next to the Omotenashi pack (with a wigstand, a small pampflet with all students, a bag and tea) we got our passes, food cupons, T-Shirts and our savior, the 2 GB internet Simcard!
Our room was just amazing and very spacy. We were kind of lucky. Normally the teams stores their baggage in an special room, because the rooms are normally very small.
 |
| Our Omotenashi bags |
 |
| Our presents in our room from the International Hotel Nagoya |
 |
| Our Simcards, passes and more |
So we just throw everything into the corner, checked our championship costumes and prepeared everything for the next day (we put everything into the hand carry so it was just taking everything out).
Luckily our costumes survived the trip and we could go shopping for the next day.
Japanese summer is very hot and humid.
This year we had luck and it was quite nice. Someone told us, that the weather 2015 was about 10°C and 10-20% humidity more.
But I still wanted to buy icespray, icesheets, wiping sheets, icepacks and blotting paper. It was the best decision ever and really saved us. Blotting paper is a bless and these ice sheets are the best invention ever!!
The bought more and more during the whole trip. It really helps to endure this summer heat of 30°C-40°C.
After this long arriving day we went to bed and were sleeping like a dead stone.
We finally arrived and the adventure finally begun.

Oct 13, 2016 | Cosplay, International Cosplay Contests |
Next to the costumes, preparations and skit, we needed to fill out some forms.
We had about 4 different sheets we needed to fill out.
1. Construction report
2./3. Performance Sheet
4. Costumes
5. Participation agreement
All sheets needed to be sent in 1 month prior of the championship with the finished video file, audio file and original pictures of the characters you are going to Cosplay.
You have about 2 weeks to fill out the most forms (we got the construction report earlier) and you need a lot of information’s regarding your props (size, Kg, pictures) and costumes. This is why we finished all our championship costumes and props, made all pictures, measurements, scripts etc. beforehand so we just needed to copy and paste everything inside.
1. The construction report
The construction report is a power point presentation which you use during the craftsmanship judging in order to present your costume. You are supposed to talk 5 minutes per person about your costume and to use the presentation as support. You can show your finished work in comparison to the original artwork, the materials and the technique you used. It had 3 main sections; Costume, wig and prop. We kept it in the order we wanted to present our costumes and decided to change after each section. The rehearsed a lot, because we were afraid not to finish everything in the time frame. Our report was about 24 pages.
2. The performance sheet->The prop setting
In this sheet you write everything about your props inside; Height, length, wide and weight and a picture. This is necessary, because there are limitations. The staff will check the measurements and weight (incl. the weight of your costume) at the craftsmanship judging day. In this sheet you also fill out where the props should be set at the stage and how your stage setting is at the start of the ski and what will be left after the skit.
3. The performance sheet->The rider

In the rider you write down a short description of your skit and a detail one for the camera setting. You also need to mark where you will stand and where your props will be at which point of your audio. Additionally to that you write down the light setting and the special effects you want to have at a certain moment at your skit.You also write down your phrases in English and Japanese and describe what happens on stage at the certain moment and time code.
4. Costumes
This was the easiest sheet. In this sheet we just wrote down which costumes we are going to wear at which event.
They told us that no changes are possible, because the Cosplayers are going to be announced with their costumes at most of the events.
Actually someone changed his costume without notice before a courtesy visit and it caused a lot of trouble. It happened in front of the Major where a lot of cameras recorded this mistake. Furthermore the press people all wrote down the wrong character name. I guess it was kind of embarrassing for the Cosplayer.
Afterwards they told us, if we need to change a costume, we have to tell the staff beforehand. I guess they accept changes if you notify them in order to prevent embarrassing moments like this.
5. Participation agreement
In this sheet you just sign and agree with the rules of the World Cosplay Summit and the usage of your pictures for promotion purposes.
A lot of teams had troubles to finish these sheets in time, because they weren’t finished with their championship costumes or skit or weren’t prepared for that. A lot of pictures and information’s in detail were required. If you missed to take pictures and gather the information’s, 2 weeks are a very short timeframe. Some of them couldn’t take pictures or write everything down because without finished costumes gathering all these material is nearly impossible.
The most crucial part was the costume construction report.
If you don’t have pictures of a certain technique, because you are not done, you cannot show it to the judges.
Difficult also seemed to the light rider. I am quite used to it because I write light riders every 2 weeks. But I guess for people who have no idea about light setting and effects it can cause trouble.
I prepared everything beforehand and could finish it in 2-3 evenings. I made it in Japanese and English so it was easier for the staff to read our sheets and light rider.
I guess if you are prepared it is quite easy to fill out all these sheets. The preparation itself took hours and hours… I think it was quite tough to finish everything in 2 weeks.

Oct 11, 2016 | Cosplay, International Cosplay Contests, Uncategorized |
|
| Picture by Japanaily |
I am back from one of my biggest journeys of my life and my head is full of great memories, experiences and new friendships. It was an honor to participate at the World Cosplay Summit and Iam really grateful for this experience.
I never though that the World CosplaySummit would be such a rewarding event.
This is why I decided to blog about it. So I can share my experience and write down my memories and thoughts.
If you have any questions or wishes about which topic I should write. Please don’t hesitate to ask.
Today I want to start with the Preliminary 1 year ago and the way to the championship.
The Preliminary in Germany:
One year ago I participated with my partner Chiko at the Preliminary at the Connichi, one of the biggest Anime/ Manga events in Germany.
I did I because I really love to perform and could try out new things on stage next to singing and dancing.
I never though we really would be become the next WCS Team Germany, because I know that other awesome Cosplayer are trying since years and years and I was just a rookie who started to participate at competitions recently.
I was happy but really felt unsure if I would be really able to represent Germany accordingly.
Buying the materials:
Because we never expected to become the next team we already planned and booked a Asia trip in November.
This was also the reason why we decided a week after the preliminary which costume we are going to bring to Japan. We knew that we would visit Taipei and Dubai, where you can get fabrics and crafting supplies for small money.
I calculated the time schedule for the WCS and realized directly after the preliminary that we don’t have a lot of time and need to start practicing an sewing as soon as possible.
These are the costumes we decided to bring to Japan:
Because I knew that we are short on time I finished the interview Cosplay 2 weeks after the Preliminary. It was a good feeling to know, that at least one Cosplay is finished before enjoying the holiday in Asia. In Taipei and Japan we went shopping and got most of our material for our WCS costumes. Chinese silk is awesomely cheap over there… We bought wonderful Chinese embroidered silk for about 3-4 Euro per 90 cm. And 50 Meter braids for about 3-5 Euro.
We mostly bought our braids in Dubai. Because they were cheaper than in Taipei.
The skit:
Because I knew we need to practice a lot I finished the audio file in February.
We decided to go for Adekan and to use our preliminary skit, because we got a lot of good advices. I wanted to make a better skit than at the preliminary. So I we though, that pimping up and improving our skit would be a good choice.
The audio consists out of 12 Songs, 25 cuts, 160 pieces and a lot of corrections.
It took me about a month to complete it. I worked at it every day about 4 hours.
We adjusted the audio file till June in order to get the perfect timing and speed for all the effects.
It took me 3 months to write the skit and to rewrite the choreography.
The skit and the choreography has been changed and adjusted till June. We worked a lot on it to make it “better”.
At first it was very difficult for us to learn the choreography and to get used to the new movements, because we are very unsporty and don’t know anything about dancing or material arts. You can imagine that my bruises already got some names… But after 3-4 months it went better and we could start working on smaller movements of the hand and the way of walking.
A lot of people asked me how long we practiced.
We practiced from February till departing every week one between 4-10 hours. Sometimes 2 or 3 times a week. Our last practice was 2 days before departing to Nagoya.
The costumes:
Next were the championship costumes.
I started sewing directly after coming back from my Asia trip in December and it took me about 7 months to complete my championship Cosplay as well as my props and quick change costumes.
Ill write about the construction of them in an other blog.
Ive never put so much time, money and effort into a costume as for the championship.
The costumes are really not perfect but I am
very very happy about them.
I haven’t studied or learned how to sew so I needed to watch a lot of tutorials or ask friends for certain new techniques. But it was worth it.
I worked at them about 4-10 hours a day and I admit it was very exhausting.
 The props:
For me it was the first time to build stage props which need to fit into a luggage. My friend owns a very big car, that’s why it was quite a challenge.
For the gate and the box we decided to use a clip box board system.
It is very simple to build up and to transport it.
The cage is made out of plastic pipes.
We shaped the rings with heat in order to get a ring.
I need to admit that I am noob regarding to light stuff. That’s why my friend helped me to construct it. And I just watched and helped him to get the stuff done….
I only know that it took quite a time to finish it and I am really thankfull, that he helped me this much.
Next to the skit and the costume I realized that planning and preparing yourself is also very time consuming and important. The earlier you think about your baggage the earlier you might avoid problems. We had problems to transport our swords, because they are too long for a normal luggage. Cause we though about it beforehand we solved this problem in a very simple and cheap way.
Also informing yourself about the events and what is expected of you is very important.
The most important thing was to inform myself about the hotel, the surroundings of the Hotel regarding craft supplies and batteries etc, as well as about the weather.
Japanese weather is very different to ours in Europe. So I checked what gadgets might be useful in order to survive an outdoor event in the Japanese summer heat.
I also got spares for all of my props, batteries and everything that might be damaged during the transport in the airplane.
Actually planning, making research and preparing myself took about 2-3 months of my sewing and practicing time. I never though that it would be that time consuming.
But it was worth it, because we were prepared for every case and could avoid stressful situations.
Sep 29, 2016 | Cosplay, Japan, Photoshootings, Travel, Travel Reports |
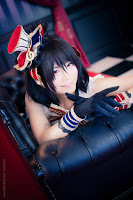
|
| Picture by Hazuki |
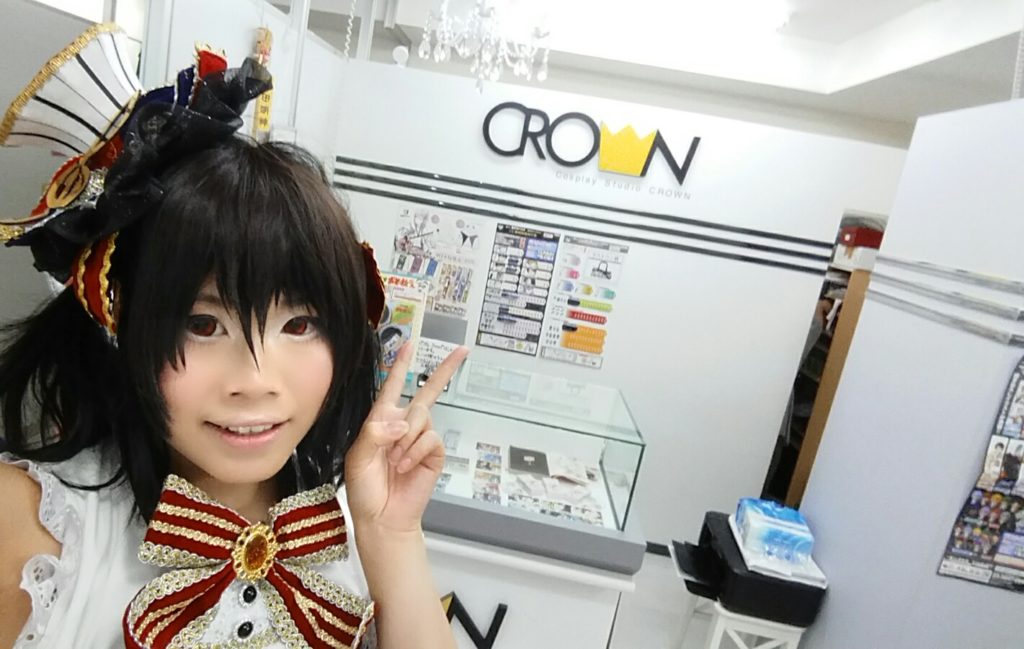
The Cosplay studio crown is a studio located near to the Akihabara train station in the center of Tokyo. It is about 5 minutes walk from the station. The studio offers 6-7 different settings, which you can use to make pictures in your Cosplay. You also can rent goods, cameras or camera equipment there and also Cosplays, if you didn’t bring an own one. You are allowed to use the pictures for your personal promotion and Cosplay goods.
The operating times from the studio are 10 am to 10 pm. You pay for the entry once for a designated time and can use the location you like to, as long as they are not occupied by other Cosplayers.
The fees for the 3 hours time frame are quite cheap compared to other studios:
| Timeframe |
Working day |
Weekend/public holiday |
| 3 hours |
1.700 en |
2.400 en |
| 6 hours |
2.980 en |
3.980 en |
| 9 hours |
4.580 en |
5.500 en |
The beginning:
The Studio is located at the 5th floor of a grey building. If you don’t know the address or notice the small sign of this studio, you will most likely pass it. If you found the building, just go into the elevator and get to the 5th floor. Stepping out from the elevator the studio is located to your left.
If you go in you need to put out your shoes first and go to the counter. Just tell the counter which time frame you desire, pay and you will get a number. The staff keeps track of the time with this number. You need to give it back at the end of the rental in time. This means you need to change in this certain time frame.
As everywhere in Japan, it is not allowed to come in Cosplay to the location or the studio. You are required to bring the costume with you and change at the studio or the event. After paying and getting your number you go to the changing room and change into your costume.
 |
| The counter |
The changing room:
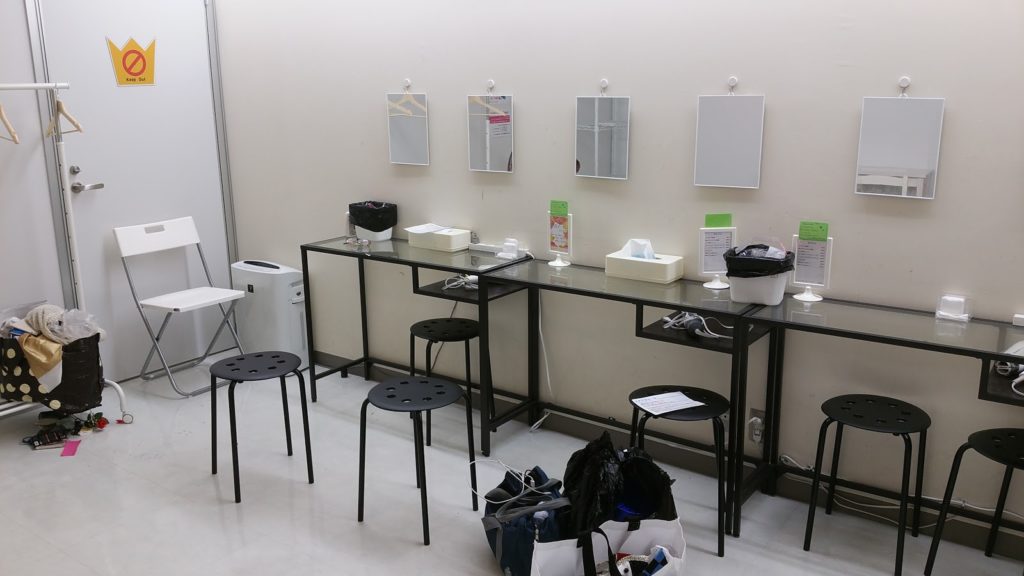 |
| Changing room |
The changing room has a lot of space, some mirrors, a cloth racket, dryer, tissues, cotton pads and Q tips. They also provide a comb or bobby pins for a small fee. There is also a board where you can put your belongings into. Sadly there are no lockers like in the Hacostadium. But because it is Japan, I doubt someone will steal your belongings as long there are no valuable things inside.
After changing I put my normal cloths into my back and put it into the board. If you want to use shoes, which you also wore outside once before, you are supposed to wipe them clean before stepping out to the locations. So I wiped my shoes and got my wallet and Smartphone and left the changing room.
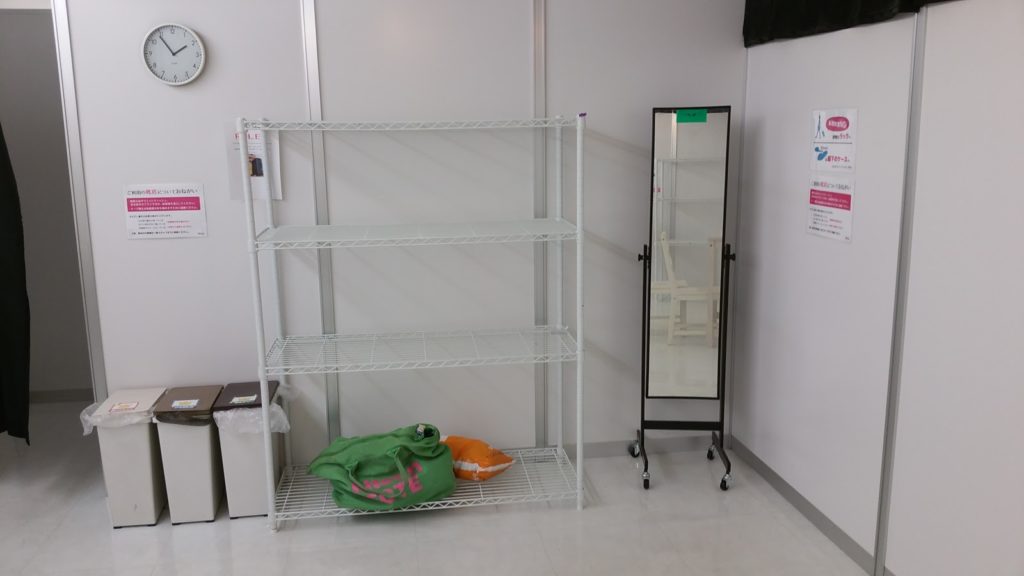 |
| Changing room |
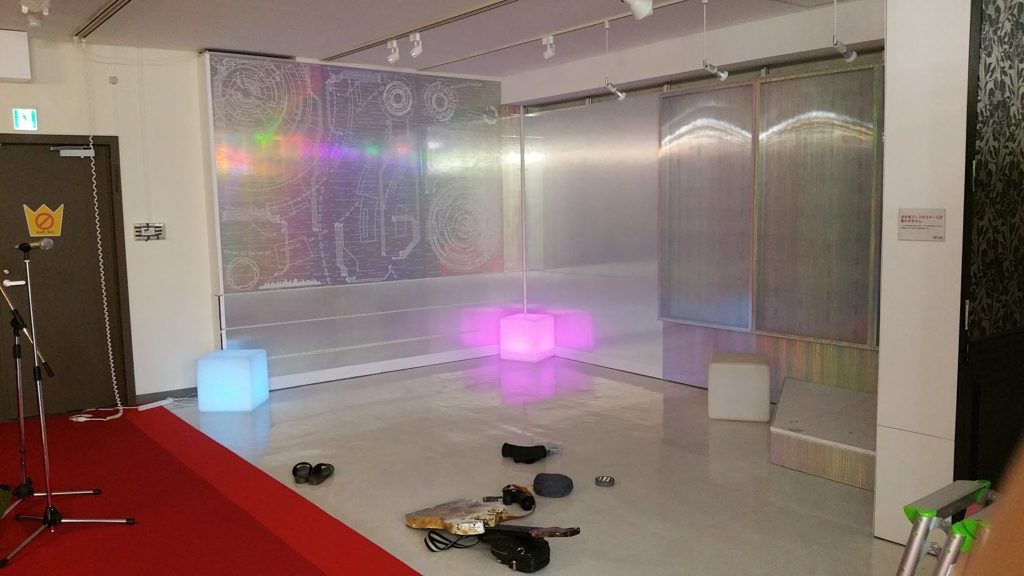
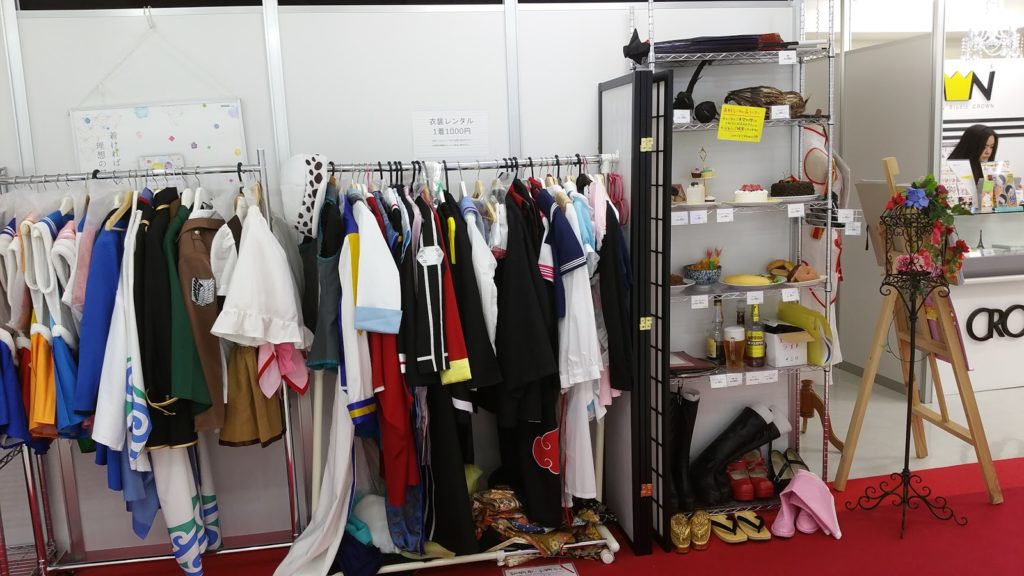
Shooting:
The Studio Crown is compared to the other studios I ve seen so far quite small. But they still have some nice settings. You can choose between 6-7 different settings and also can rent some Cosplay items or camera equipment.
The most rental goods require a rental fee. Some goods can be rented for free. As far as I could see small ladders and reflectors are provided for free. If you want to rent something, take you number and go to the counter. Tell them what you want to rent and they give it to you. If you want to return it, show your number again. You pay when you check-out.
During the shooting you can take a break and get free tea or water.
I really like this service. You can sit down, check the pictures and rest.
I took some pictures of the different shooting locations:
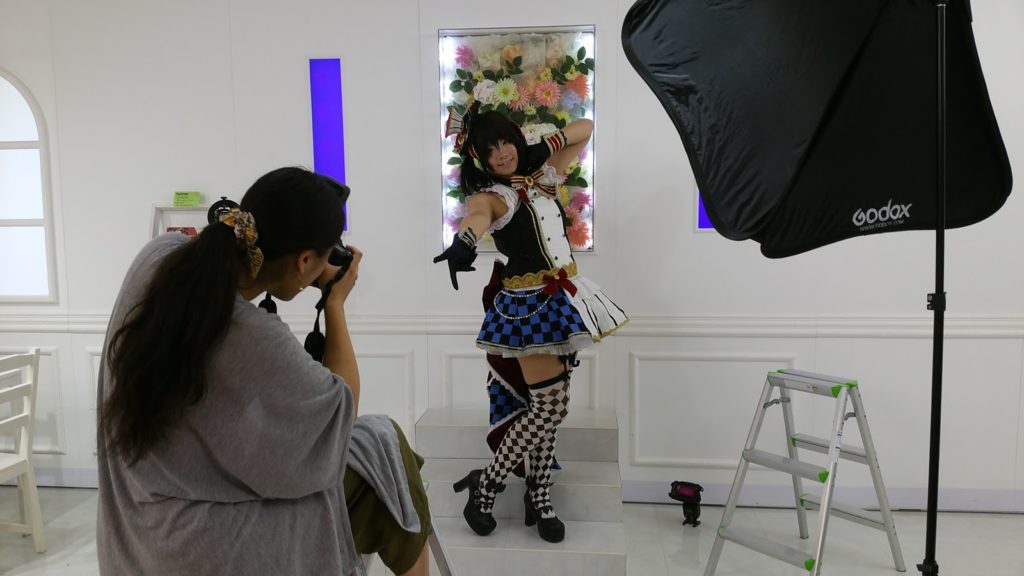
Like at all the other studios, you have to bring your own photographer. But they also seems to offer an full experience course, where you can get make up, costume and also a photo shooting with a photographer provided by the studio. For this package you need to reserve beforehand.
You are allowed to use all locations to your liking and also to change between them.
Just be careful not to disturb other Cosplayers or to block for a too long time a location. Japanese Cosplayers don’t wait openly, but others might be interested in shooting at this location, even if you don’t recognize. Also be sure not to take pictures of other Cosplayers if you haven’t asked them for permission.
 |
| Rental goods |
If you have problems or need assistance you can always ask the staff. Just keep in mind they only speak Japanese. (But if you book the package, I guess there will be some English speaking stuff, because the package is targeting foreigners and is only available at the English website.).
 |
| Picture with the help of the staff by Hazuki |
After the shooting:
When you finished with your shooting, keep in mind that the time frame also includes your changing time. So you need to change about 30 minutes before your time runs up. You just go back to the changing room, change back and return your card with the number to the counter. If everything is ok, they will thank you for using the studio. If you overstepped your time or rented things, they will charge you.
If you still have time try out to write into their guestbook. You can put some pictures inside, draw something or just write a message. I really liked to go through it, because a lot of foreigners seem to visit this studio and wrote very interesting and nice things.
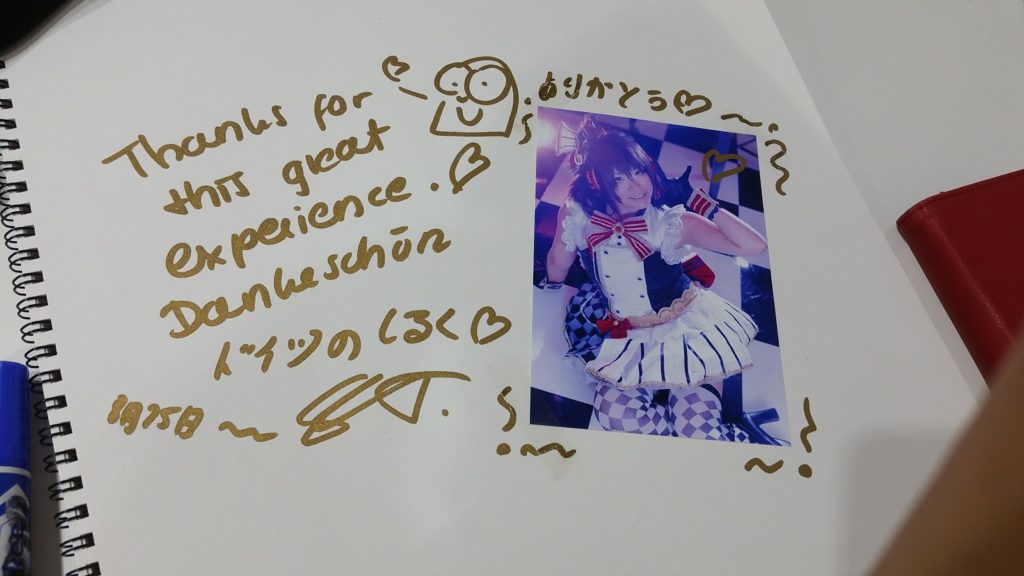 |
| Guestbook |
My opinion:
What I really appreciate is the location and the easy system.
The studio is located in the center of Tokyo, just 5 minutes walk from the Akihabara JR station. You neither need to reserve, nor to get a membership. So even if you are a foreigner, it is super easy to use this studio. You don’t need to provide an ID card and also don’t need a Japanese address. Like everywhere the staff couldn’t speak English. But I saw that they are quite accustomed to foreigners, because I saw a lot of signs in English and Japanese. I also like the idea about the Cosplay experience package, where you can get Make up, a Cosplay and even pictures.
Compared to the other studios the 3 hours course for 1.700 Yen seems quite cheap. But it does not include a lot of free rental items and also don’t include amenities like bobby pins, brushes, wig sprays etc like the Hacostadium. I personally don’t need it, because I mostly bring my own things, but I saw that a lot of Cosplayers are making use of that service. They also only provide about 6-7 settings, this isn’t much if you compare it to Hacostadium. But you need to keep in mind, that space is very rare in Tokyo. Especially in Akihabara in the very center of this town.
 |
| Picture by Hazuki |
In my opinion it is a good choice for first timers, who want to experience the Japanese way of Cosplay and to try out a studio without the hassle of getting a member ship or getting through the language barrier. You don’t need to fight against the other Cosplayers for your space in the changing room and even have proper chairs and mirrors to get ready. Because of a limited number of settings you can concentrate more on one setting and get used to it. I also liked it, that you can go shopping and get some nice food with friends before or after the shooting. The location is a big plus!
Facts:
Operating hours: 10 am – 10 pm (no closing days)
Free: 1.700 en -5.500 en
Address: 2 Chome-4-6 Sotokanda, Chiyoda-ku, Tōkyō-to 100-8111, Japan (5th floor)
Map:

Feb 16, 2016 | Japan, Travel, Travel Reports |
Japan is not only famous for beautiful shrines and traditional culture but also for a very modern and unique pop-culture.
While being in Japan I always recommend visiting theme cafes/ restaurants. I guess the most famous ones are cat cafes and Butler or Maid cafes.
I visited different cafes until now and want to report this time about my experiences at a maid cafe.
What is a maid cafe?
A maid cafe is a restaurant where young waitresses are serving food while wearing a European style maid uniform. The original idea was to create a space likely to a rich household in Europe with maids and butlers who are taking care of their “master”. In Japan flats are very small and the daily routine can be very stressful. Maid cafes are supposed to be a space where people can relax and escape the daily routine.
You can find different types in Japan. At some cafes the waitresses are just serving the ordered items politely like at the Cure Café in Akihabara, while other waitresses are also entertaining their guests with games or live music shows.
You are not allowed to touch the maids and to take pictures of her. You can buy a picture afterwards, which is normally taken by another maid. Also calling her if you don’t want to order something is mostly prohibited.
Generally you are paying a certain fee (about 0-1.500 yen) for a certain time frame. Mostly it will be about an hour. At some maid cafes you are also obligated to order a certain amount of drinks or dishes.
Dishes and drinks are a bit more expensive than the average Japanese restaurant although the prices can differ a lot between the cafes.
Sometimes you also can buy merchandise or order stuff like a picture with your favorite maid or a live concert.
Which maid café would you recommend?

Maidremin
I always like to visit the Maidreamin maid café. Maidreamin is a Maid café chain and has stores through the whole Japan.
It is very easy to find the cafes because you can check out the locations at their homepage or just look for a maid in their uniform standing around at the street in Den Den Town (Osaka) or Akihabara (Tokyo).
Maidreamin is the only Maid café I could find where pictures, except of the maids, are allowed. Mostly you are not allowed to take pictures at all.
They also provide English menus and have sometimes English speaking staff (although we always needed Japanese, because the English was very basic).
Maidreamin is a maid café where maids are behaving like a “kawaii” (cute) maid. The maid uses magic spells to make your food tastier, talks with you, play games and sometimes sings for you at the stage (I visited 2 times and experienced 2 concerts).

I also like, that every Maidreamin café has another setting. My favorite so far was the Mario Café where you have Mario boxes hanging above you head.
The dishes are tasty and always arranged cutely. You are paying an admission fee about 500 yen (1.000 yen if you want a special seat, so be careful!) for an hour and are obligated to buy a drink and a dish.
Dishes and drinks are starting with 500 yen.
Set menus are starting with about 1.500 yen and are mostly including a picture with a maid, a drink and food.
@home
I have never been at the @home café before but I know it is very famous along foreigners.
They also provide English menus and have cafes especially for foreigners.
They own several stores in Akihabara, located at the Don Quiote with different settings and also have a traditional setting for where the maids are wearing Kimono orientated uniforms.
The follow the same “Kawaii” concept like the Maidreamin café but pictures are prohibited. So you can’t even take pictures of your food or your friends while enjoying the maid café expect paying a certain fee for taking a picture with a maid. The admission fee for an hour is about 600 yen and they have a strict ranking of their maids. You can see at the ribbon they wear which ranking they have.
Food and drinks are starting with 500 yen.
The reason why I never visited this café before was, that you need to line up. Waiting can take until 3 hours. I tried to visit this café 4 times and always needed to wait between 2-3 hours.
So be prepared to wait or visit the café at 10 in the middle of the week to prevent lining up for hours.
 Cure Maid Cafe
Café cure is the first Maid café in Akihabara located in a side street in the 6th floor. Everything started with this maid café.
This café is very different compared to the other two maid cafes mentioned before.
The waitresses are wearing traditional Victorian style maid dresses and the setting is based on a typical European café.
The waitresses are extremely polite and very well mannered (it was very embarrassing how they talked to me…).
The food is very good, priced average and if you are looking for a place to enjoy and relax in the busy and bursting city Tokyo, this is the right place!

You don’t have an admission fee but you are expected to leave the café after an hour.
The coffee is very good and the drinks are starting with about 300 yen.
Pictures are not allowed, even if you want to pay for it.
My opinion:
I really like visiting theme cafes and it is always a great experience to visit a maidcafe.
It is a unique but still important part of Japanese cultur.
Sometimes it is very difficult to go without any Japanese knowledge. So I would recommend to take at least a Japanese speaking friend.
If you have questions don’t hesitate to ask.