Apr 16, 2017 | Uncategorized |
I am back from my
first USA trip ever and I am so happy that I was able to experience
the Anime Matsuri!
It was a honor to be
there and a pleasure to meet all the awesome people there!
Thanks so much for
having me and giving me such a great time!
I am so happy I
could meet many new people and some dear friends again!
Thanks for all the
presents and all the people who came to my booth to visit me!
Iam so happy, that
so many people took their time and visited me! Thanks for thinking of
me, sharing your time with me and chatting with me!
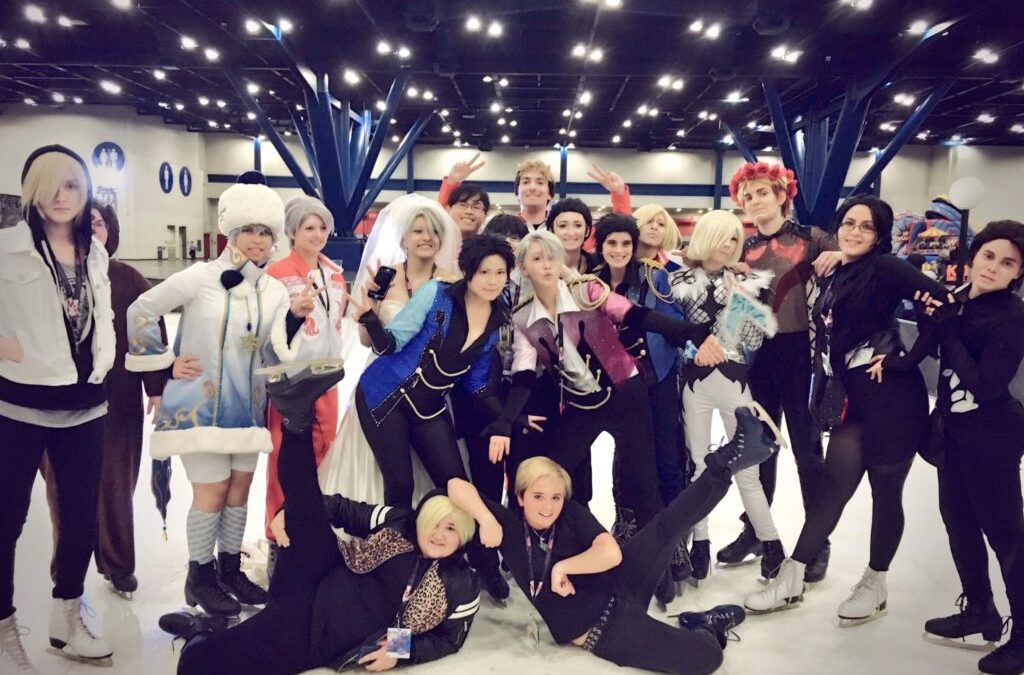
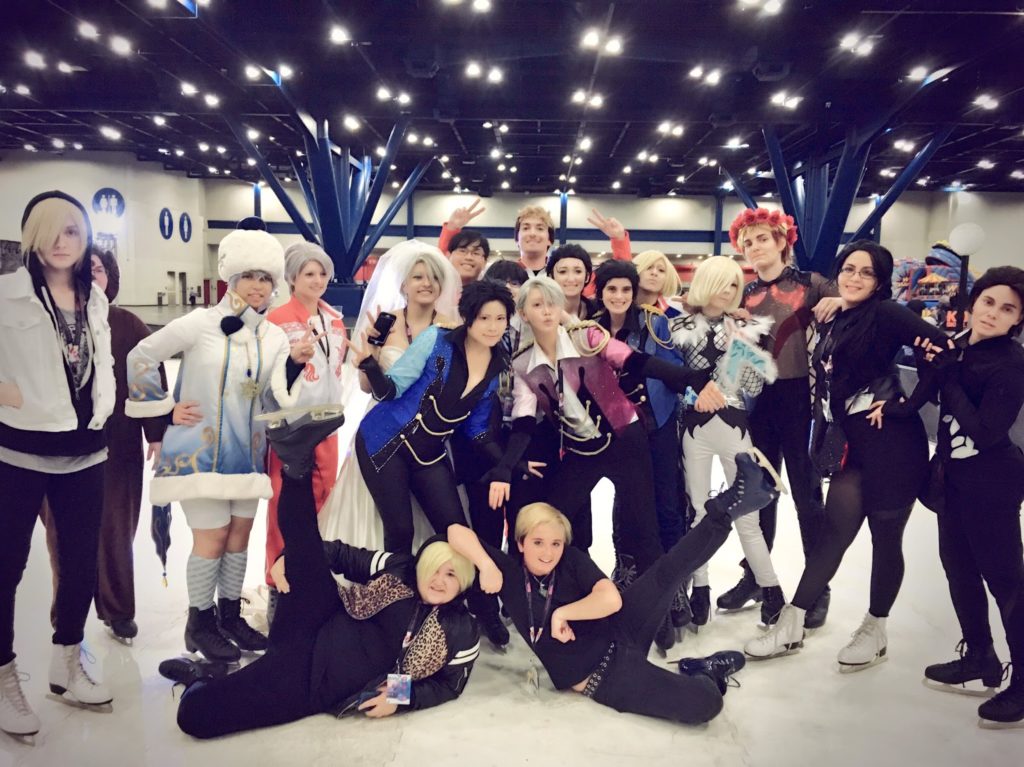
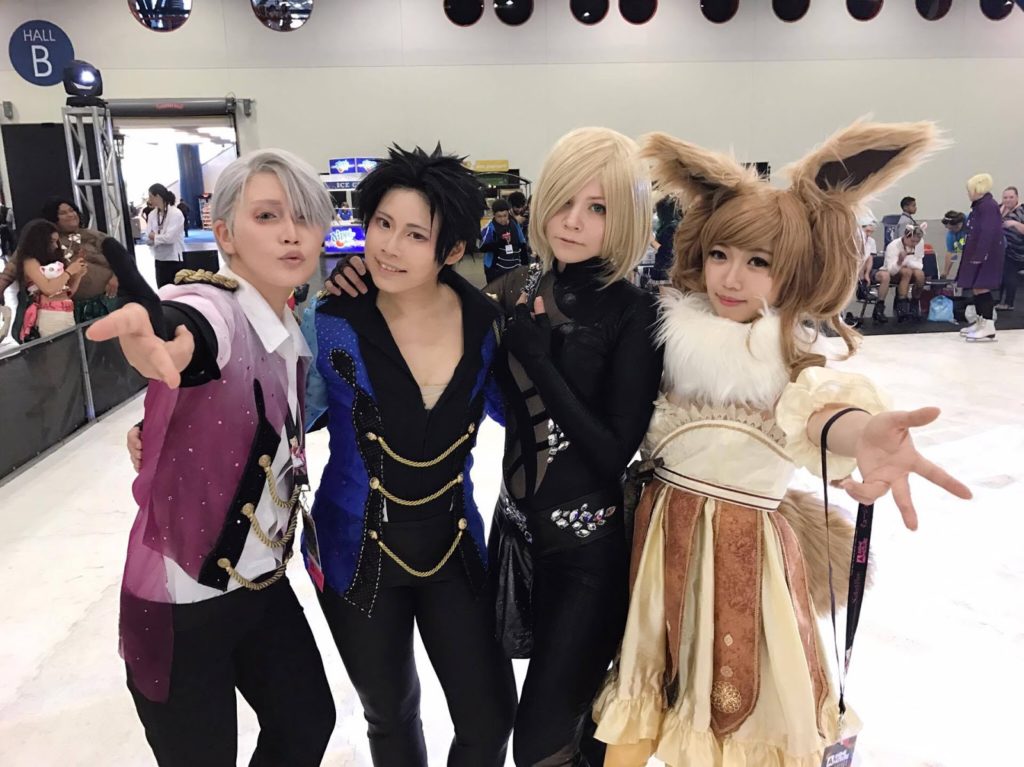
Also thanks for
having me at the Ice rink event which I really really enjoyes!
It is so great to
meet so many people who love the same Animes and share the same
passion Cosplay as me!
My first convention
in the US has been a really great experiences! Thanks everyone for
making it possible! Thanks for the awesome support of everyone and
the great job the staff did. I could have never enjoyed it that much
without your awesome work!
Thanks thanks thanks
for just making this possible for me!

Jan 30, 2017 | Cosplay, Photoshootings, Travel |
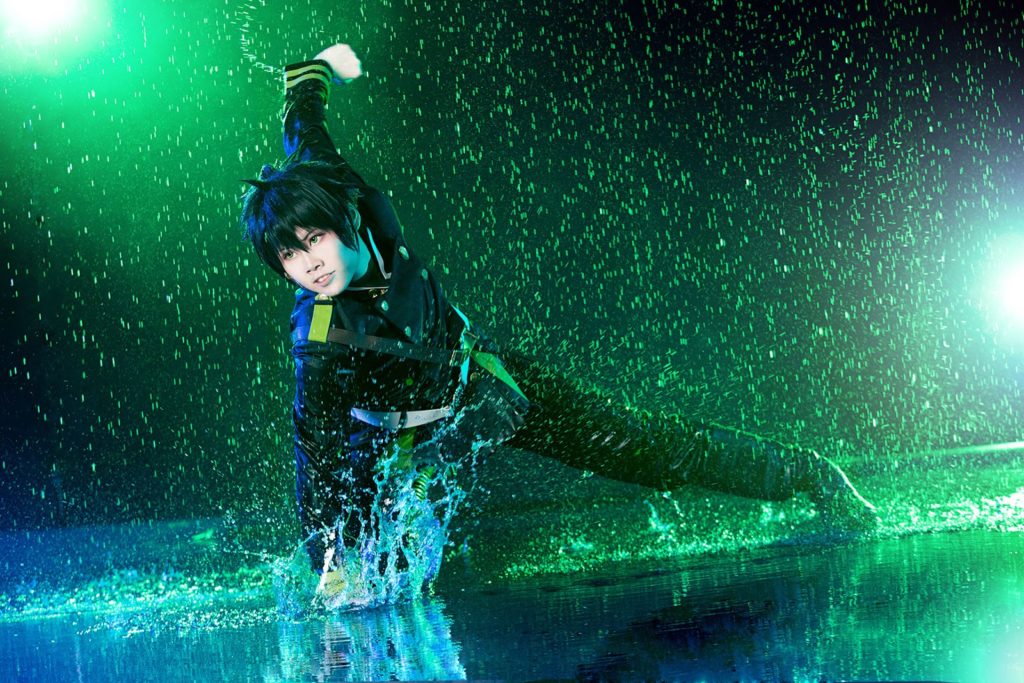
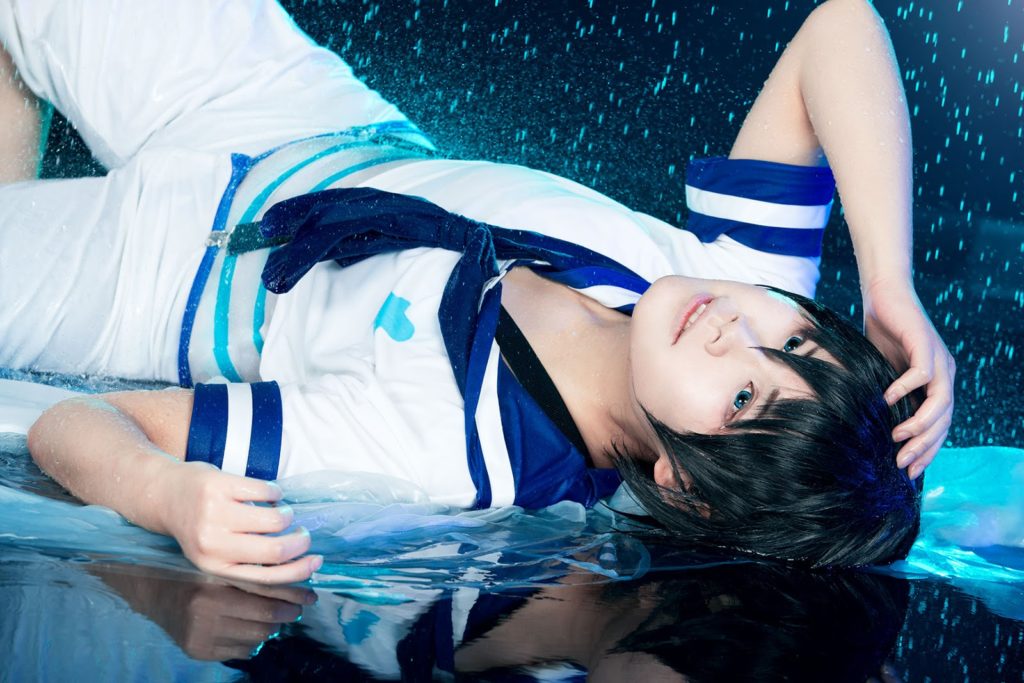
This weekend, I had my very first rain set shooting in my life.
I really love Japanese Cosplay studios and would love to take pictures in such a special location more often than once a year (when I am in Japan).
Sadly in Germany there aren’t many photostudios equipped with special furniture’s or special settings.
We still gave it a try and could find a few ones, which are offering furnitured or special locations for photoshootings.
Of course the standard in Germany is compared to Japan quite low but luckly there are still some, which are worth a visit.
About the studio:
This time we tried out the Uwe Lammer photostudio in Wuppertal.
Because I don’t mind traveling for a good photoshoot I decided to travel to my photographers place (Meermiau), who lives 4 hours apart from me.
(Normally he´s the one travelling, but this time it was my turn ^_-).
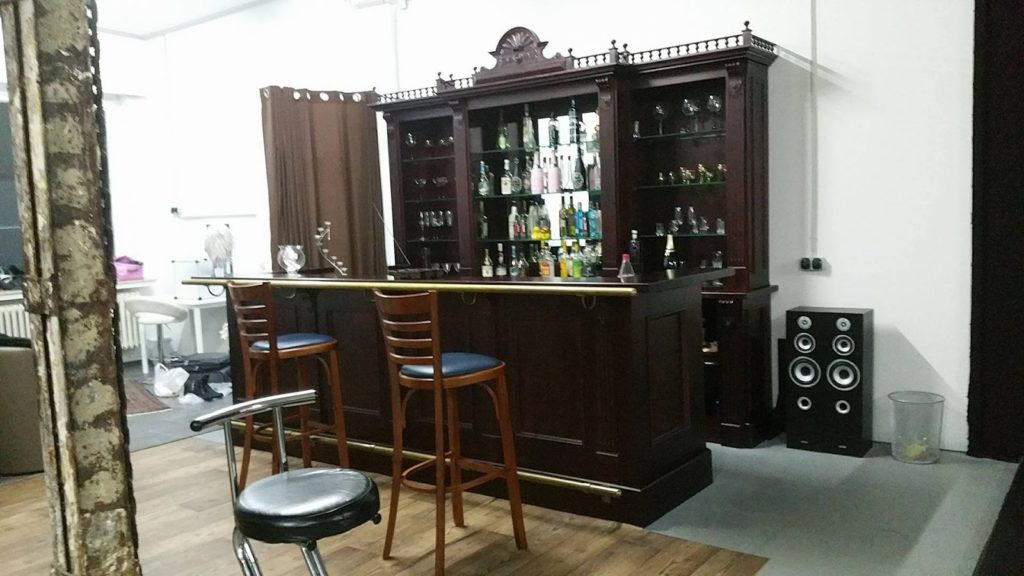
Uwe Lammer offers 2 different studios. Each studio has several different but unique settings.
We decided to book studio 1 which included:
 |
| A living room setting |
 |
| A Lost place setting |
 |
| Black/ Grey/ White background setting |
 |
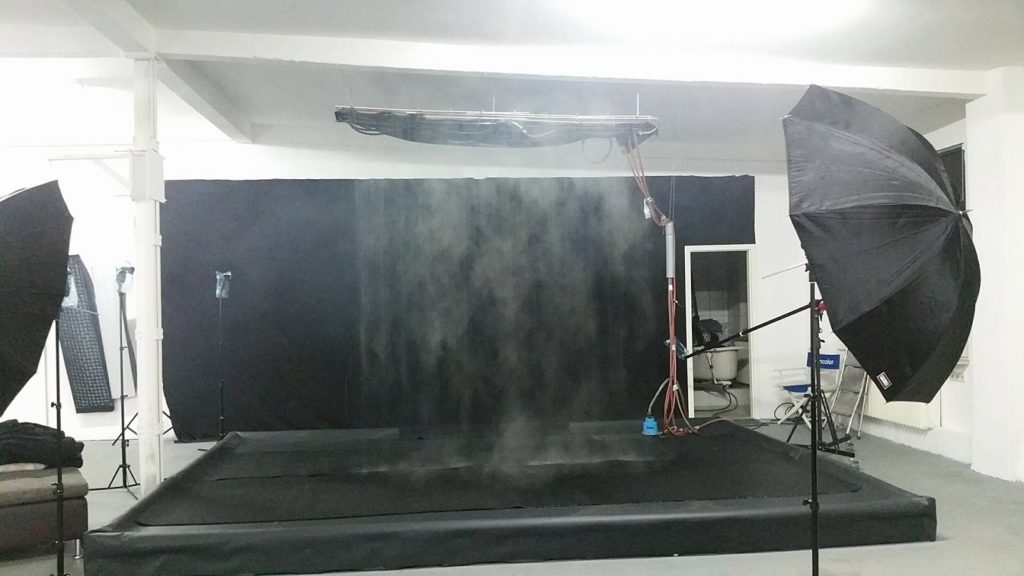
| A Rain setting |
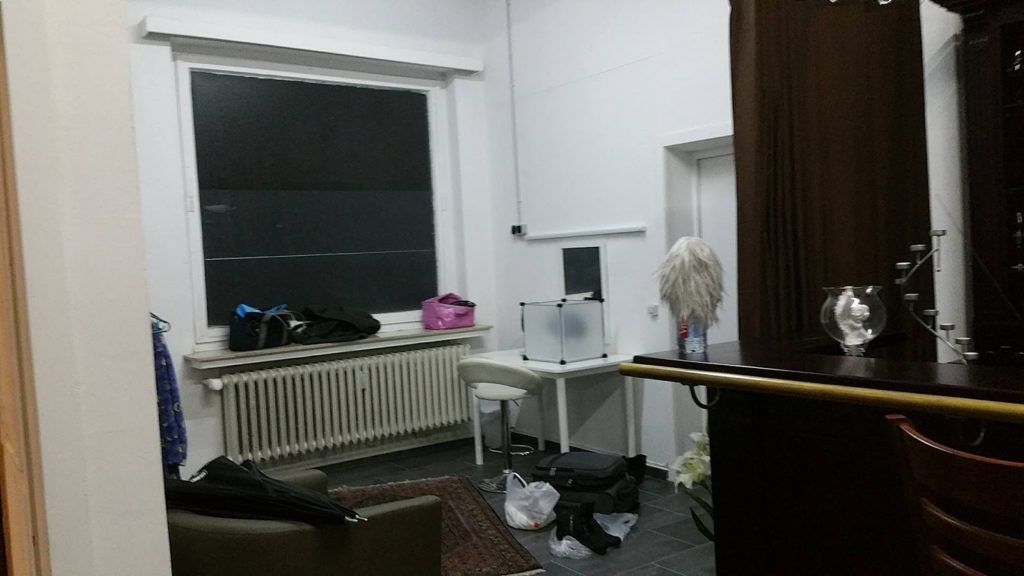 |
| Changing corner with a mirror |
Also a fog machine was included. The studio also offers a light equipment rental.
But because Meermiau just bought two new flashes (now he has 5 including 2 umbrellas and colorfoils), we decided to go with our own equipment.
Unlike to Japanese studios you have a lot of place.
It is less cramped and you have enough room for your light setting. It is also a one costumer only studio. You don’t have to share your space and can take pictures without getting disturbed by other costumers.
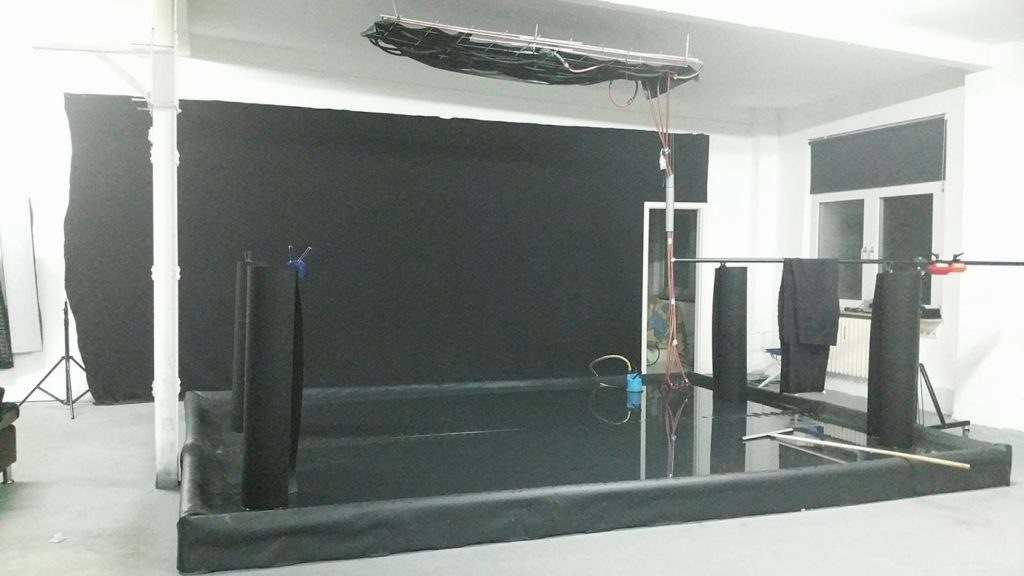
The rain set:
We decided to book the rain set for an additional fee.
The rain set is approximally about 3 x 6 meter and features 3-4 different types of rain “shape”.
The most important thing: The room is heated and the water is warm or hot (depending on your personal preferences).
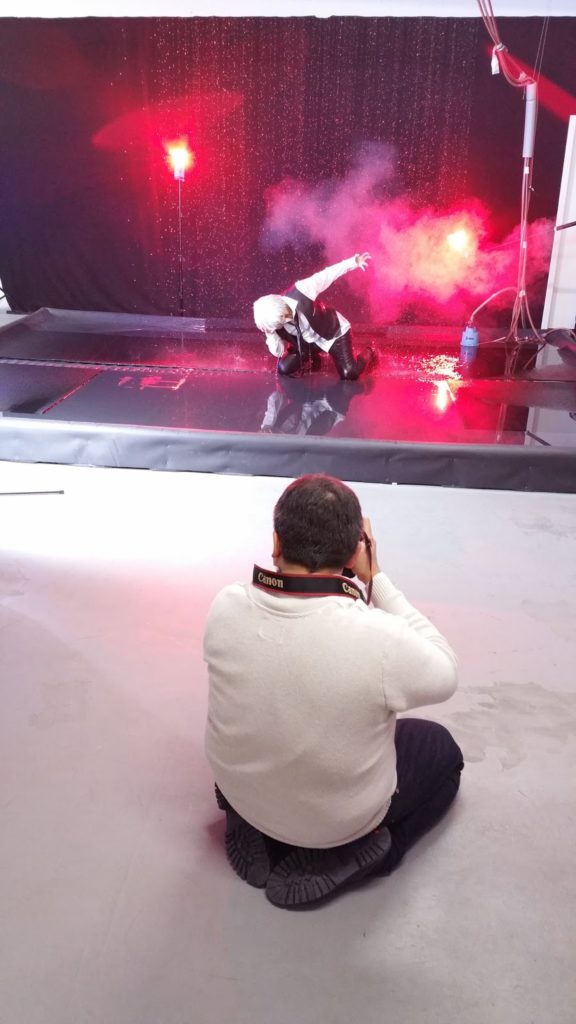
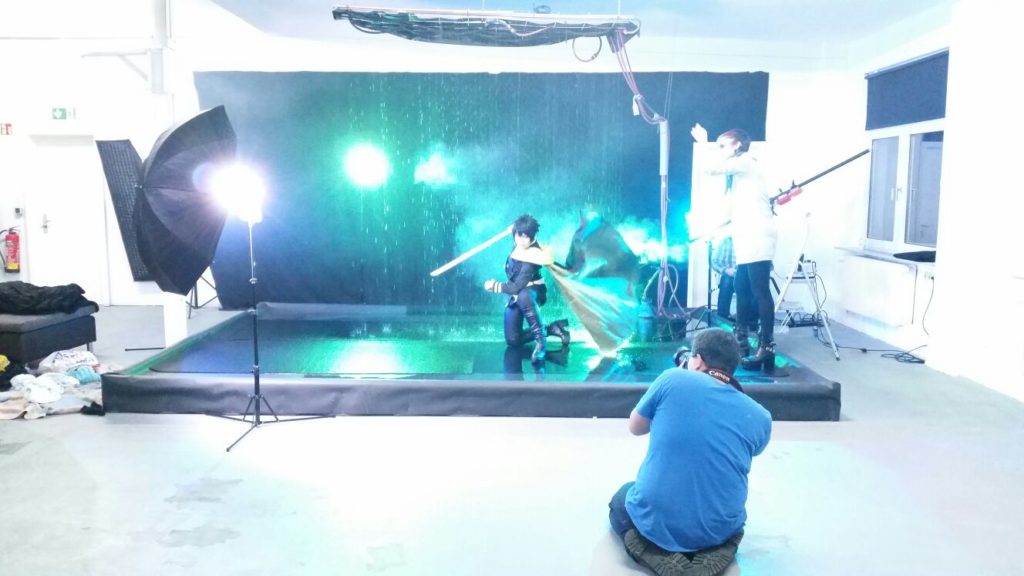
During the rain shoot, the owner Uwe will assist you and control the rain and fog machine (if you also want to use the fog machine). He can give you a lot of good advices and is a really nice guy.
You just tell him which water you need and if its too cold or too warm.
It was really helpful to have him, because we made pictures without an assistance and it was really comfortable to have someone around who controlled the water.
What you should know:
In this studio it is prohibit to step on the set ground with shoes without special mats.
It would be very slippery and shoes can damage the ground surface easily.
But the mats are quite big so it wasn’t a major problem.
The next thing is, you will get wet. Really really wet… down to your panties.
After only a few shots, I had a sea in my shoes and I was drowned in water.
If you go there, bring enough towels, changing cloths and shoes.
If you have parts or wig stylings which are not fit to get wet, don’t use them.
Its not like a slight rain, its like jumping into the sea and going diving for a while…
Also be careful and use water proof makeup, so it wont smudge during the shoot.
If you want to avoid looking shiny during the shoot, try to use a make up which has a good matt effect.
Uwe also told us, that the shoot is mostly over if you get water into your eyes. Because it would burn. It seems to be a bigger problem if you wear contacts.
I don’t have this problem, but my Cosplaypartners told me that’s a well known problem.
Although the water is warm, it can be a quite freezing experience.
Your whole body is wet, but during the shoot only a part of your body is under the warm water. This leads to the famous bathroom effect, that he other body parts are getting really cold.
We shooted about 1 hr per costume. Afterwards I got dry and changed.
I think this was a good timeframe. Because after 1 hour, you are not only reeeaaally wet but also really cold.
Warming up is quite important.
I also want to note, that it can be extremely exhausting.
I am pretty used to jump, run, holding difficult poses. But the water shooting was kind of level up. You have to be careful about the shape of your wig and if you want to do more poses than just standing or sitting around it takes more time than usual to get the perfect shot.
Next to your face and body it is important how you move. Because every movement causes a different shape of water.
It is also more slippery than usual and it gets cold very fast.
I can normally shoot about 15 hours a day with a break between every Cosplay for changing and a 1 hr food break.
I guess with a rain set, 8 hours are my limit.
An advice to the photographers:
Spitting around too much water is not allowed, because there are electronic devices, flashes and similar things around the rain set. But water still gets out of the designated wet area.
We used Meermiaus equipment and plastic bags to protect them.
Be prepared that you equipment might get wet.
Also plan your light setting beforehand. The faster you got your light and flash setting, the longer you can shoot. It is a run against the limited endurance time of your model.
Or the cloths and capes, which are getting heavier and heavier after every try.
I know that normally the photographers are making the light setting. When I am working with Meermiau, I make the setting and tell him what I want and need. I like to do this because due to that I have a great influence on the lightning of my pictures.
Maybe it is a good idea to talk to your model about the settings before making a water shoot.
Next time we will definitely bring an assistance.
We both work mostly without any assistant, because we don’t want to bother a third party.
But it is really handy.
If you want to throw capes, wigs or similar it wont fly as usual, because it got wet and heavy.
It is nearly impossible to get a nice flying effect without assistance.
 My opinion:
It was a really great, unique and fun experience!
It was not cheap (but cheap compared to other German studios) but worth the money.
We didn’t really know if we could manage this shooting, but in the end it was really fun and we could take some nice pictures.
The owner was also a cutiepie and he assisted us even with our baggage and my very very wet costumes.
If you want to try out a rain shooting, I really would recommend to try it once in this studio.
Just be aware you will be very very wet!
Name: Uwe Lammer Mietstudio
Adresse: Scheffelstraße 33; 42327 Wuppertal
URL: http://uwelammer.de/fotostudio-wuppertal-mietstudio/

Oct 17, 2016 | Cosplay, Events, Travel |
Comic World is one of the biggest Anime/ Manga related events in South Korea. The event is held monthly for 2 days in Busan and Seoul at different locations. The concept is based on the Comiket in Tokyo. During the 2 days you can buy Doujinshis and merchandise from Korean circles or companys, watch Cosplay-/ singingcompetitions or just stroll around in your Cosplay and meet friends.
Since I was in Japan and wanted to visit a country I have never been before, I decided to make a side trip to Seoul during the week where the Comic World would be held.
The Comic World Seoul is always held at 2 different locations (Setec and AT center). I visited the one held at the Yangjae Citizen´s Forest Station ATCenter. The location with 2 floors is split into a big entrance hall, a hall with a stage and huge artist alley and a big park.
Of course I also took the chance to Cosplay there. Like in Japan it is not allowed to come to the venue in Cosplay. The event provides changing rooms and a make up room for getting ready.
 |
| Outside of the venue |
Get in the venue:
But before entering the location you need to buy a ticket at the outside of the venue.
The entrance fee is about 4.000 Won per day, there are no weekend tickets. After getting the ticket you just go the entrance and exchange your ticket to a stamp.
After going through the entrance hall you arrive at the hall with the huge artist alley.

As I mentioned before it is not allowed to come in Cosplay to the venue. You have to change and register yourself as a Cosplayer.
The Cosplay registration system might be quite complicated and unusual for foreigners but I really like how efficient and thoughtful the event handles the process.
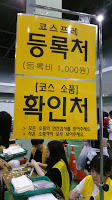
1. Fill out the form:
At first you go to the table and fill out the registration form for your Cosplay. You need to write drown your personal dates and also note, which Cosplay you are going to wear.
The registration is completely in Korean. Luckily a good Korean friend accompanied me and helped me in this matter.If you cannot speak or read Korean here a translated version of the form:
2. Register yourself:
 |
| Registration desk |
 |
| Wristband and entrance stamp |
After filling out the form you go to the registration table. You give them your form, pay the 1.000 won fee and get a wristband with a number on it. The wristband shows your registration number. If anything might happen they can find your personal dates with this number.
3. Get changed:
After getting the number you go to the changing or the make up room. Because I already did my make up I went directly to the changing room. The make up room is just a huge room where you can sit on the floor and finish your make up. There are no tables, chairs, amenities or mirrors provided. I really got the Comiket feel there. XD
 |
| Blue: changing room, pink: Make up room |
But instead of a big room the changing room system is different than in Japan.
At the entrance of the changing room you show them your wristband and get a number.
This number is your changing room number.
 |
| Number and changing cabin |
 |
| Cabins |
You go to your own changing room cabin and change. At the entrance of the changing rooms is a big mirror where you can check if everything is in the right place.
Instead of changing in a big room with everyone together you get your own small changing space. After the Comiket I really started to appreciate this! The cabin wasn’t that big but much more space than you normally get in other events in Japan.
 |
| Number for the baggage |
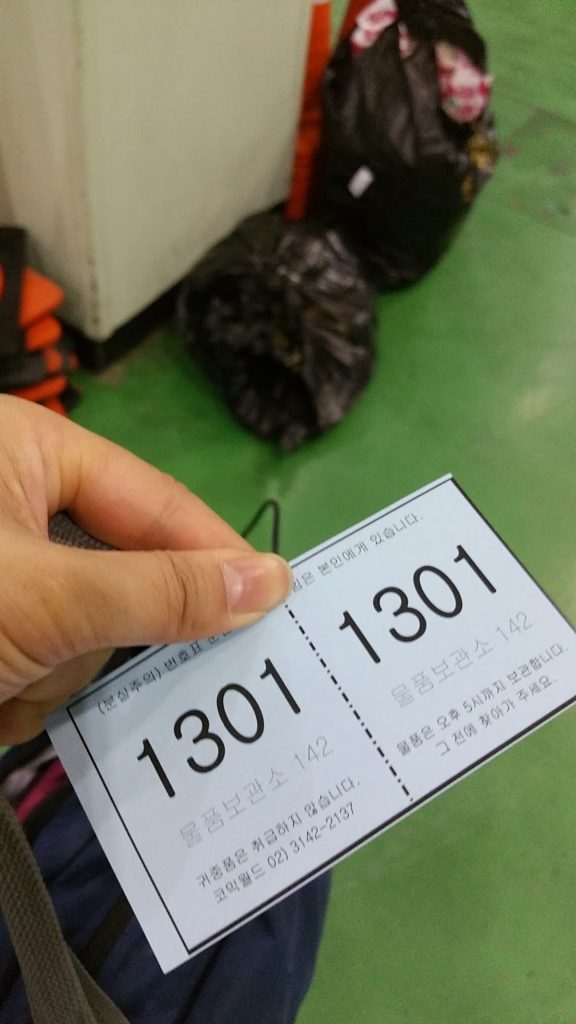
4. Get ride of your baggage:
After changing you can use their baggage drop service. I really loved that service!
You go to the next counter, grab a big black bag and just put your stuff inside of this bag and close it tightly.
Afterwards you go to the next counter and give them this bag.
In exchange you get a small number, which you need to keep. If you want to get your stuff back, you just show them your number and get your stuff.
If I am right you can get your bag and store your bag as often as you want during the day.
 |
| Baggage storage |
5. Enjoy it:
After changing and getting ride of your baggage you can stroll around at the venue, go shopping or go outside and enjoy the other Cosplayers.
After enjoying yourself at the event, you take your baggage with your number and change back in the changing room.
 |
| Entrance hall |
The Venue:
As I mentioned before the venue is split into 3 different sections.
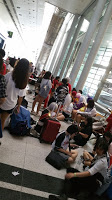
The entrance hall, the main hall (2 floors) and the park.
At the entrance hall you can find the escalators to the 2nd floor, a caterer where you can get some food and drinks, toilets and a lot of Cosplayers sitting and strolling around.
In the summer season Korea seems to be very hot. Inside it is very nice and comfortable due to aircondition.
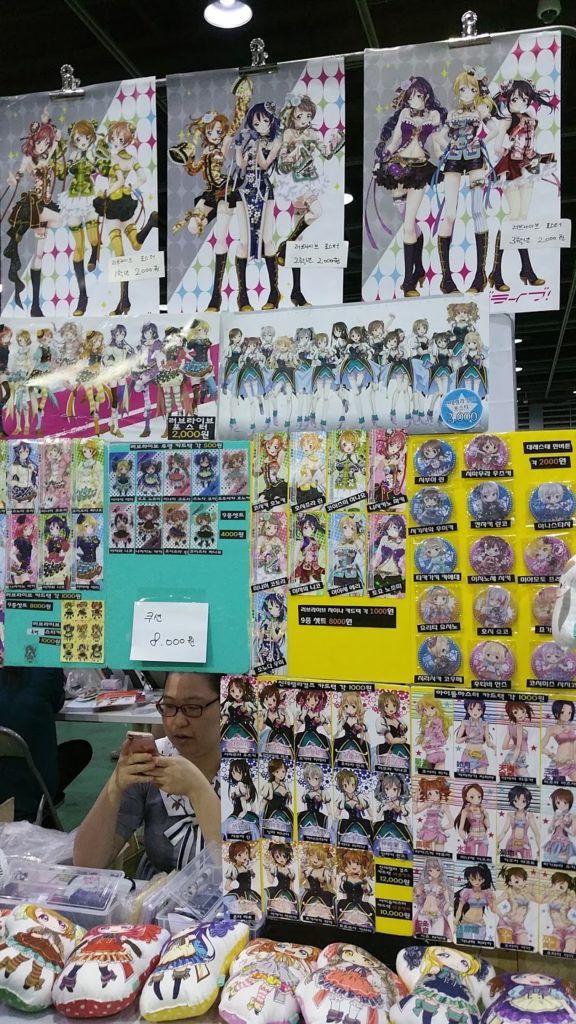
The main hall at the first floor contains a very huge artist alley where circles are selling their self-made Doujinshis, artbooks or other merchandise at nearly 1.000 booths.
 |
| Artist alley |
 |
| Booth |
The prices are rather cheap. You can get nice items already starting with about 1.000 won.
In this hall you also can find the main stage. At Sunday the karaoke and Cosplay contests are held there.
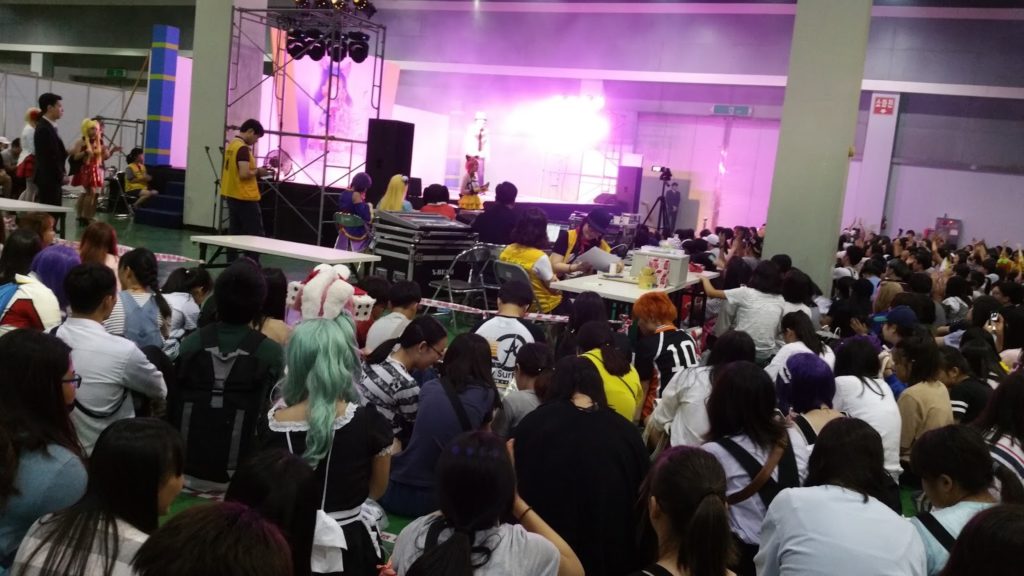 |
| Stage |
There are no chairs but a carpet where you can just sit down on the floor.
The Cosplay contests are quite different than in other countries. At the group performance contests, the people participate with bought costumes, because the performance is more important than the Cosplay itself.
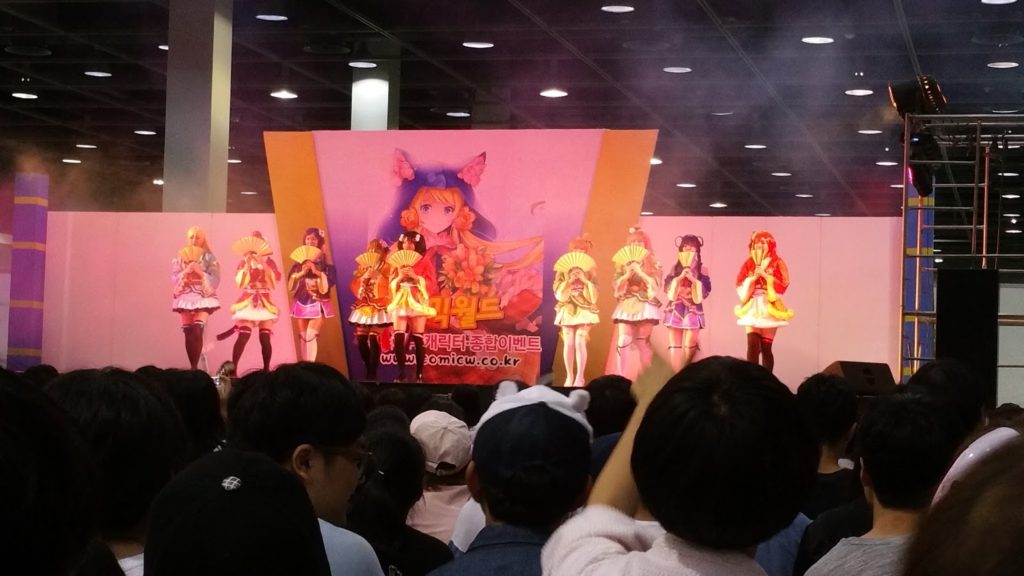 |
| Cosplay Contest |
A performance can be about 10-20 minutes long because there seems to be no time limit.
I really enjoyed the show.
Next to the stage is the baggage storage and the changing room for the Cosplayers.
At the 2nd floor is another big artist alley. You also could find some commercial booths of bigger companies.
Behind the building is a huge park where you can find a lot of Cosplayer taking pictures, strolling around or just picnicking.
I got the feeling that buying is rather usual than making your costumes by yourself.
But I found some very very cute Love Live Cosplayers!!

|
| Outside of the venue |
Taking pictures:
It is not allowed to take pictures without asking beforehand.
Normally Cosplayers are happy to pose for you especially when they notice that you are a foreigner.
For the artist alley taking pictures are generally prohibit. But if you still want a picture you can just ask them if it´s ok. But some might be not happy about this request.
Personal opinion:
I really liked the experience to Cosplay in Seoul and really like the service for the Cosplayers. They not only provide changing rooms with separated cabins and make up rooms but also a baggage drop. The feeling was very different compared to other events I visited before but I really liked it.
What you need to keep in mind is that it is forbidden to take pictures of Cosplayers without asking them before hand and that it is permitted to go or leave the venue in Cosplay.
You need to register yourself and change at the venue.
You also need to know, that nearly no one can speak English. Some of them can speak Japanese but most of them only speak Korean.
The registration process can be a bit difficult without being fluent in Korean, so I would recommend going with a friend who is fluent.
Foreigners are rather unique there so everyone was staring at me when I talked in English, German or Japanese to my friends. They are just surprised and don’t want to be impolite.
Mostly they are very excited and open to meet foreign Cosplayer and fans. I also had a small chat with some of them in Japanese and got the feeling that it is a very open and warm community.
If you have the chance and like Cosplay or Doujinshis, I definitely would recommend to visit this event once.
Operation hours: Saturday – 11 am to 5 pm/ Sunday 10:30 am to 5 pm
Entrance fee: 4.000 Won per day
Cosplay fee: 1.000 Won per day
Table at the artist alley: about 35.000 won per table and day
(Registration for a table at website directly after the event or at the event at the Artist Alley registration booth)
Homepage: http://Comicw.co.kr/
Location: AT Center or Setec in Seoul, Bexco in Busan


